Snag My Blinkie

Find me on FB

Blogs I Love


Proud Member


Blog Awards


Showing posts with label Forum Set. Show all posts
Showing posts with label Forum Set. Show all posts
Thursday, June 20, 2019


~~Click
on Sample to view full size~~
This
Tutorial was written on June 17th, 2019 by Ashly
It
is of my own creation and any resemblance to any other tutorial is
purely coincidental.
Please
do not copy and do not post elsewhere.
Do
not translate or script.
This
tutorial is written as if you have a general knowledge on how to use
the program.
***What
you'll need***
Program
of Choice.
I
am using Photoshop CS6
But,
if you know your tools you can use any program of choice
Tube
of choice.
I
am using the artwork of MarieL
It's
gorgeous and a large size so you can do close ups if needed!
And
comes with multiple layers for various color variations
as
well as with or without her holding the cotton candy
You
can find her HERE
Scrapkit
of Choice
I
am using the scrapkit “Cotton Candy” by Moon Vixen Designs
It’s
a stunning kit with 5 Papers, 105 elements, 3 frames.
There
is SO much you can do with this.
Animation
of Choice
I
am using SimoneAni515
You
an find it HERE
~*~*~ Let's Get Started~*~*~
Start
a new canvas
650px
by 250px
Open
MD-PAPER -1
Duplicate
Change
the top layer to multiply
Open
your tube
I
am using layer 5.
Position
on your canvas to your liking.
I
positioned mine towards the left of my canvas.
Duplicate
once in position
Filter
→ Blur → Gaussian Blur, 3 px
Change
the blend mode to soft light and the opacity to 43%
On
the bottom layer add a drop shadow.
No
below the two main two layers and above the paper layers add a few of
the tube.
I
flipped a few horizontal.
Once
done, Change the blend mode to Luminosity, opacity at 45%
Add
a layer above this, add a pattern here, I did little white pixels
With
blend mode at soft light.
~*~*~*
Time to add Elements! ~*~*~*
Here
is what I added from the bottom layer up
with
a drop shadow, unless otherwise stated:
ELEMENTS
-MD- 3 (no dropshadow, blend mode, color)
ELEMENTS
-MD- 12 (no dropshadow)
*Animation
will be added here
ELEMENTS
-MD- 24 (no dropshadow)
ELEMENTS
-MD- 24 (no dropshadow)
ELEMENTS
-MD- 91
ELEMENTS
-MD- 41
ELEMENTS
-MD- 66
ELEMENTS
-MD- 63
ELEMENTS
-MD- 99
ELEMENTS
-MD- 38
ELEMENTS
-MD- 90
ELEMENTS
-MD- 27
ELEMENTS
-MD-15
ELEMENTS
-MD-45
ELEMENTS
-MD-59
ELEMENTS
-MD-52
ELEMENTS
-MD-97 (no dropshadow)
ELEMENTS
-MD- 97 (no dropshadow)
Now
add 3 new layers
Control
+ A
On
the top one
Edit
→ Stroke → 4
A
color from your tag
Inside
Filter
→ Noise → add noise
12.5%,
Gaussian, Monochromatic
Repeat,
but make the stroke 5
With
a different color
on
the bottom layer
repeat
the middle layer but make it black
then
Filter → Blur → Gaussian Blur → 3
Now
there are two options here, you can either be done
and
skip the animation portion or go for it!
If
you're with me for the animation...Let's do this!!
Open
the animation we're using
I
like to group mine together.
To
do that select all the layers and hit
Command
+ G
Woot
now they look like they're in their own handy layer or folder
Now
drag this layer over to your canvas while holding shift
Then
resize IF you'd like.
Add
the name of your name to your tag as you'd like it.
~*~*~*Most
important~*~*~*
Add
your copyright
as
you'd like it.
Now
make sure your animation is above the grassy hill layer
and
open the envelop we put them in and close all of the layers
except
for the first one.
To
open in click the little arrow.
Now
we animate.
Open
up Timeline
Window
→ Timeline
You'll
want it as frames so you may need to click the button
in
the center of the little window that pops up and a tiny version of
your tag pops up.
At
the very bottom the first drop down, make sure it says, “forever”
And
under the frame we're going with 0.1 seconds for this one
Now
you have your first layer done.
Second
layer you're going to click the add layer
which
is right in front of the trash can.
Then
go over to your layers we just opened. Close your frame we are seeing
and
open the next frame.
Repeat
the until all 18 frames are done.
Then
press play and watch it go.
Then
you're going to save.
To
save a gif.
It's,
ctrl + alt + shift + s
For
those that didn't do animation
Make
sure you add your name
and
~*~*~*Most
importantly~*~*~*
Add
your copyright information!!!
Then
for the avatar
I
did the canvas of 175 x 200
Used
part of my canvas
and
then repeated the borders
as
well as the animation.
ALWAYS
include your copyright information
never
EVER forget that!!
Tuesday, September 10, 2013


~~Click on Sample to view full
size~~
This Tutorial was written on September 10th, 2013 by Ashly
It is of my own creation and any resemblance to any other tutorial is purely coincidental.
Please do not copy and do not post elsewhere.
This Tutorial was written on September 10th, 2013 by Ashly
It is of my own creation and any resemblance to any other tutorial is purely coincidental.
Please do not copy and do not post elsewhere.
Do not translate or script.
This tutorial is written as if you have a general knowledge on how to use the program.
This tutorial is written as if you have a general knowledge on how to use the program.
***What you'll need***
Program of Choice.
I am using Photoshop CS5
But, if you know your tools you can
use any program of choice
Tube of choice.
I am using the artwork of Tatjana Art
You must purchase a license to use
her tubes and can do so HERE
Texture of Choice
I am using 02 by
AnOrderOfFishsticks
You can find this for download HERE
Brush of Choice
I am using french4 by Obsidian Dawn
You can find these for download
HERE
Addittional Filters
PhotoEffex – Scanlines
Xenofex 2 – Constellation
~*~*~ Let's Get Started~*~*~
Start a new canvas
600px by 250px
Choose two colors from your tube
Add a gradient to your canvas
You can use mine as a sample for
how you might want it to look
Add your tube to your canvas at
verious sizes and different points, once again, use mine for a bit on
an example of what to do here.
Once you have them where you're
wanting them, Merge all the tubes together and change the blend mode
to luminosity
Duplicate this layer
Filter → Blur → Gaussian Blur,
3.0 px
Change the blend mode to soft light
Filter → PhotoEffex →
Scanlines, change the width to 3
Add the texture to the canvas
Position how you'd like
I rotated mine 90 degree clockwise
Resize a bit if you'd like as well
Using your custom shapes tool, add
a new layer above the texture
Draw out a couple of hearts how
you'd like them and then select them and press delete on the texture
layer
Delete the custom shape layer once
you're done with this
Add a drop shadow to the texture
layer
Duplicate your main gradient
background layer and move to the top of your canvas
Change the blend mode to color
Add a new layer
Select inside the two hearts
Use the brush french4 to stamp out
the writing inside both of the hearts in white
Change the blend mode to soft light
Lower the opacity to 50%
Now write out believe in love a
couple of times and place on your canvas
You can use mine as a sample again
:)
Have this in black
Change the blend mode to overlay
Add your main tube to your canvas.
Center it as you'd like it.
I erase a bit of the ribbon that
was still showing on the right
Duplicate this layer once you're
happy with it's size and position
Filter → Blur → Gaussian Blur,
3.0px, change the blend mode to soft light
To the bottom on add a drop shadow
Add a new layer
Edit → Stroke
Center, Black, 12px
Change the blend mode to overlay
Add your name
*****Most Important*****
Add your copyright information
If you're not wanting to animate
you're done!
Save to your liking.
If you do want to animate on we go!
Crop your canvas to it's size
Go down to your texture layer
Duplicate 3 times so you have a
total of 4 texture layers
using your magic wand select inside
the two hearts
Filter → Xenofex 2 →
Constellation
With the following settings:


Repeat this for the following 3
layers
Hit random seed once before you hit
okay on each one.
Hide all of the texture layers
except for the bottom one
Open the animation window
Change the delay to .15 seconds,
set to repeat forever
Add a new layer and hide the first
layer, unhide the second
Add a new layer hide the second
layer, unhide the third
Add a new layer hide the third
layer, unhide the fourth
Press play and watch your animation
go!
If you're happy with your results
safe as a.gif and you're done!
For the avi:
Hide the name, credits, border and
main tubes layers.
Start a new canvas 200 px by 200 px
Select all of the still visible
layers of our original canvas
Drag them over to our new smaller
canvas
Move the layers around a bit until
they're where you're wanting them
(I just showed the top right heart
portion in the middle of my avi)
Crop down to the size of this new
smaller canvas when you're happy with what is visible
Add the border as we did before but
use a stroke size of 6 for this one
Add your name
****Most important*****
Add your copyright information
Animate it just as we did the
banner
Save to your liking (if you
animated or not)
And you're done!
Sunday, May 5, 2013


~~Click on Sample to view
full size~~
This Tutorial was written on May 5th, 2013 by Ashly
It is of my own creation and any resemblance to any other tutorial is purely coincidental.
Please do not copy and do not post elsewhere.
This Tutorial was written on May 5th, 2013 by Ashly
It is of my own creation and any resemblance to any other tutorial is purely coincidental.
Please do not copy and do not post elsewhere.
Do not translate or
script.
This tutorial is written as if you have a general knowledge on how to use the program.
This tutorial is written as if you have a general knowledge on how to use the program.
***What you'll need***
Program of Choice.
I am using Photoshop CS5
But, if you know your
tools you can use any program of choice
Tube of choice.
I am using the artwork of FourXsDeigns
This tube is called "Molly"
It comes with 12 different layers
6 full body tubes with different color schemes and 6 close ups of those
You must purchase a
license to use her tubes and can do so HERE
Animation of choice
I am using SimoneAni371 by
Scrappy Bit of Fun
Which you can find HERE
Addittional Filters
PhotoEffex - Scanlines
~*~*~ Let's Get
Started~*~*~
Start a new canvas
600px by 250px
Choose two colors from
your tube
I used the headband and
chose a middle blue and a light blue
Add a gradient to your
canvas
You can use mine as a
sample for how you might want it to look
Duplicate your gradient
layer
Filter → PhotoEffex →
Scanlines
Change the Width to 3
The Rest at default
Change the blend mode to
soft light
Add your tube to the
center of the canvas
Resize and reposition as
you'd like
Duplicate
Filter → Blur →
Gaussia Blur, 3.0px
Change the blend mode to
soft light
Add a drop shadow to the
bottom tube
Add your tube in between
the two gradient layers a couple of times
I flipped one horizontally
Change the blend mode to
luminosity and lower the opacity to 50%
Add 3 new layers at the
top of the canvas
Use rectangular marquee to
select the canvas
With the bottom of the 3
new layers selected
Edit → Stroke
12, Center, Black
Repeat this for the next
layer up but with a width of 8 and the middle blue color we used for
the gradient
The top one with a width
of 2
Deselect
On the bottom change the
blend mode to overlay
The middle of the three
layers
Filter → Noise → Add
Noise
Uniform, 30%,
monochromatic
Add your name
*****Most Important*****
Add your copyright
Select the background
layer we added the PhotoEffex to
Add your animation to your
canvas
If you need to reposition
make sure all the animation layers are selected so they'll all move
together
With them all selected
click Ctrl + G (this will make them a group)
Hide all of the animation
layers now but the first one
Open your animation window
Have the delay set to .1
sec, and to go forever
Add a new window, hide the
first animation layer and unhide the second
Do this for all layers
just hiding the last and unhiding the next in line
**I deleted the first 4
frames of the animation since it didn't show to much with where the
tube is positioned**
Press play to watch it go,
if you're happy with your result
Save as a .gif and you're
done!!
(Ctrl + Shift + Alt + S)
Now to make the avatar
Hide the frame layers and
the group animation layer
Along with the copyright
and name
Start a new canvas
175 px by 200 px
Drag all the layers over
Resize and reposition as
you'd like
(make sure they're all
selected again so they all resize and move together)
Add the frame as we did
with the main tag
Add your animation again
if you'd like to, just as we did before
I just resized mine to be
much smaller to fit the small avi
Add your name or initial
***Most Important***
Add your copyright
Save to your liking and
you're done!
Saturday, April 20, 2013


~~Click on Sample to view
full size~~
This Tutorial was written on April 20th, 2013 by Ashly
It is of my own creation and any resemblance to any other tutorial is purely coincidental.
Please do not copy and do not post elsewhere.
This Tutorial was written on April 20th, 2013 by Ashly
It is of my own creation and any resemblance to any other tutorial is purely coincidental.
Please do not copy and do not post elsewhere.
Do not translate or
script.
This tutorial is written as if you have a general knowledge on how to use the program.
This tutorial is written as if you have a general knowledge on how to use the program.
***What you'll need***
Program of Choice.
I am using Photoshop CS5
But, if you know your
tools you can use any program of choice
Tube of choice.
I am using the artwork of trixychuu
You must purchase a
license to use her tubes and can do so HERE
Animation of choice
I am using SimoneAni156 by
Scrappy Bit of Fun
Which you can find HERE
Addittional Filters
MuRa's Meister – Copies
Penta- color dot
~*~*~ Let's Get
Started~*~*~
Start a new canvas
600px by 250px
Choose two colors from
your tube
Add a gradient to your
canvas
You can use mine as a
sample for how you might want it to look
Add your tube to your
canvas
Filter → MuRa's Meister
→ Copies
Wallpaper (rotate)
The rest at default
Move this layer around a
bit until you get something you like
If you can't find
something undo and redo the filter until you get it that way
Change the blend mode to
Luminosity
Lower the opacity to 25%
Duplicate your gradient
layer
Move this layer above the
wallpapered layer
Filter → Penta → Color
Dot
All at default
Change the blend mode to
soft light
Add the words “True
Love” in white to your canvas one on the upper left
Another on the lower right
Change the blend modes to
soft light, lower the opacity of each to 70%
Add your tube to the
center of the canvas
Resize and reposition as
you'd like
Duplicate
Filter → Blur →
Gaussia Blur, 3.0px
Change the blend mode to
soft light
Add a drop shadow to the
bottom tube
Using your rectangular
marquee tool draw out a square that goes from the middle of the tube
out to the right
On the original gradiant
layer
Copy and Paste
Move the new layer up to
just under the tubes
Filter → Penta →
ColorDot
Change the blend mode to
soft light
Add a bit of an outer glow
Add 3 new layers at the
top of the canvas
Use rectangular marquee to
select the canvas
With the bottom of the 3
new layers selected
Edit → Stroke
12, Center, Black
Repeat this for the next
layer up but with a width of 8
The top one with a width
of 2
Deselect
On the bottom change the
blend mode to overlay
The middle Ctrl + click on
the thumbnail
Copy and Paste the
original gradient again
Move it back up to in
between the two layers
Flip Horizontally
Filter → Noise → Add
Noise
Uniform, 30%,
monochromatic
Add your name
*****Most Important*****
Add your copyright
Select the layer with the
MuRa's Meister filtered tube on it
Add your animation to your
canvas
If you need to reposition
make sure all the animation layers are selected so they'll all move
together
With them all selected
click Ctrl + G (this will make them a group), Change the blend mode
of the group to luminosity
Hide all of the animation
layers now but the first one
Open your animation window
Have the delay set to .1
sec, and to go forever
Add a new window, hide the
first animation layer and unhide the second
Do this for all layers
just hiding the last and unhiding the next in line
Press play to watch it go,
if you're happy with your result
Save as a .gif and you're
done!!
(Ctrl + Shift + Alt + S)
Now to make the avatar
Hide the frame layers and
the group animation layer
Along with the copyright
and name
Start a new canvas
175 px by 200 px
Drag all the layers over
Resize and reposition as
you'd like
(make sure they're all
selected again so they all resize and move together)
Add the frame as we did
with the main tag
Add your name or initial
***Most Important***
Add your copyright
Save to your liking and
you're done!
Thursday, November 22, 2012
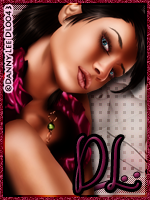

~~Click on Sample to view
full size~~
This Tutorial was written on November 22nd, 2012 by Ashly
It is of my own creation and any resemblance to any other tutorial is purely coincidental.
Please do not copy and do not post elsewhere.
This Tutorial was written on November 22nd, 2012 by Ashly
It is of my own creation and any resemblance to any other tutorial is purely coincidental.
Please do not copy and do not post elsewhere.
Do not translate or
script.
This tutorial is written as if you have a general knowledge on how to use the program.
This tutorial is written as if you have a general knowledge on how to use the program.
***What you'll need***
Program of Choice.
I am using Photoshop CS5
But, if you know your
tools you can use any program of choice
Tube Of Choise
I am using the awesome
artwork of Danny Lee
You can find this
tube HERE
Be sure to check out all
the awesome tubes he has while you're there
Template of Choice
I used Template071 by Dave
@ Spawn's Forum Set Templates
You can find them HERE
Additional Filters needed
VanDerLee – Unplugged-X
VanDerLee – Unplugged –
Effects
MuRa's Meister - Copies
~*~*~ Let's Get
Started~*~*~
Open the template
Delete the credits layer
Add the full tube above
the Main Background Layer
MuRa's Meister Copies →
Wallpaper (rotate)
All at Default
Filter → Blur → Motion
Blur
Angle of 35
Distance of 550 pixels
Filter → Sharpen →
Sharpen Edges x3
Filter → Sharpen →
Sharpen more x2
Change the blend mode of
the Black Dots to Soft Light
Select Bottom Right
Foreground
Copy and Paste the tube
copied layer we did with the blur
Delete the original Bottom
Right Foreground
Duplicate the duplicate we
just made
Filter → VanDerLee →
Unplugged-X → Pattern Offset
Change the blend mode to
soft light
Select the Bottom right
lines and on the Pattern offset one press delete
Deselect
Delete the Bottom right
lines now
Add an outerglow to the
layer we just deleted some from
Repeat this all with the
upper left triangle
In the middle add your
tube a few times, changing the size and angle a bit a few times, sort
of like I did with the show in the example
Merge all together
Change the blend mode to
luminosity and opacity at 50%
Add your tube to the two
rectangles between the pattern offset layers and the solid background
layers
Change the blend modes to
overlay, opacity at 50%
Change the colors of the
Dash Dot Lines to match the tube/set
I added a bit of a stroke
to it as well as a bevel
Add your main tube to your
canvas
Resize and position to
your liking
Duplicate
On the top one
Filer → Blur →
Gaussian Blur, 3.0
Change the blend mode to
soft light
On the bottom one add a
drop shadow
Duplicate the background
layer we made 4 times
Hide the original
On the first one
Filter → Un-Plugged →
Effects → Disco lights
First at except rotation
at 25
On the second one repeat
the filter, change the rotation to 50
The next at 75
The next at 100
Change all 4 layers to
soft light
Add your name to you tag
Select it all and add two
new layers on the bottom add a stroke of black in 10, change the
blend mode to overly
On the top add a stroke of
6 in a color that suits the tag
Filter → Noise → Add
Noise
Monochromatic, Gaussian,
12.5%
*****Most Important*****
Add your copyright
information!!
Now go to your animation
window and unhide all but one of the animation layers
Add a new layer, hide the
first and unhide the second
Add a new layer hide the
second and unhide the third
Add a new layer hide the
third and unhide the fouth
I have my delay set to .15
sec
Press play and if you're
happy with your animation and tag save as a .gif and you're done!
Now for the Avi
Create a new Canvas 150px
by 200px
Flood fill with black
On your banner merge all
but your name and the borders
Drag the black background
we just made over
Create a clipping mask
Resize and repostion the
banner as you'd like in the avi
Merge them
Drag it back over to the
other canvas
Add borders as we did
before
Add your name or initial
***Most important***
Add your copyright
information
Save to your liking and
you're done!
Subscribe to:
Posts
(Atom)
I CT For
