Snag My Blinkie

Find me on FB

Blogs I Love


Proud Member


Blog Awards


Thursday, August 4, 2011
A Sweet Addiction Tutorial

This Tutorial was written on August 3rd, 2011 by Ashly
It is of my own creation and any resemblance to any other tutorial is purely coincidental.
Please do not copy and do not post elsewhere.
This tutorial is written as if you have a general knowledge on how to use the program.
***Supplies Needed***
Photoshop – I used CS3 but any should work
Tube(s) of Choice
I am using the beautiful work of Suzanne Wolcott
You must purchase a license to use her work
You can do so HERE
Font of Choice- I'm using Mrs Saint-Delafield
Mask4 by Lizquis
Which you can get HERE
Scrap kit by KiKeKa Kits called “A Sweet Addiction”
Which you can purchase HERE
~Filters~
Xero Porcelain
~~~Remember that tutorials are guidelines, add a bit of your own spin on them and make them your own!!~~~~
*~*~*Lets Get Started*~*~*
Open a new canvas.
I start with 600px x 600px.
Flood fill with white
Open Paper 8, resize to 600px x 600px
copy and past to your canvas
apply mask to this layer
at the angle of 25 degrees, sized 425 px
Rasterize and center the mask
Open cbg_asweetaddiction_frame01
Copy and paste into your canvas
Edit --->Transform---> Scale 13%
Edit---> Transform--->free rotate 19.5 degrees
Center the frame
Add drop shadow
Open cbg_asweetaddiction_frame03
Copy and paste onto your canvas
Edit --->Transform---> Scale 13%
Center the frame
Add drop shadow
Open Paper 10, resize to 600px x 600px
Cope and Paste it into your canvas
Take your magic wand and select inside each of the three frames
Select --->Modify ---> Expand by 3
Invert your selection
With the paper layer selected press delete
Drag this layer below your frame layer
Lower the opacity to 70%
Add your 3 tubes in between these two layers, deleting the excess your don't need the same you you just deleted the bit of the frame backing you don't need.
On each of the images change the blend mode to luminosity.
As well as:
Filter ---> Xero ---> Porcelain
At default settings except blue channel set at 0
Add your main focus tube, position and resize where you'd like it
Apply the Porcelain filter to this one as well
Filter ---> Sharpen ---> Unsharp mask
With the following settings:
50%, 1.0 pixels, 0 levels
Add a drop shadow and outer glow with a color to match your tube
All default settings except opacity at 100%
Add any elements you'd like, resized to your liking and drop shadowed.
I used in this order:
cbg_asweetaddiction_scatter01 (below frame01, opacity at 50%)
cbg_asweetaddiction_ribbon02 (above frame01, below your frame paper back layer)
Now the rest above the frame03 layer but, below your focus tube layer
cbg_asweetaddiction_bubbles
cbg_asweetaddiction_icecream
cbg_asweetaddiction_cherry
cbg_asweetaddiction_rose02
cbg_asweetaddiction_ribbon01
cbg_asweetaddiction_flower02
cbg_asweetaddiction_flower01
cbg_asweetaddiction_candy01
Add your name to your tag.
Image---> Trim
Top left pixel color, all boxes checked, okay.
Rize to your liking
******MOST IMPORTANT******
Add your copyright info
Save your image and you're done!!
If you try my tutorial please send me your results so I can see them as well!!
TYSVM for stopping by!!
Ashly
Monday, July 18, 2011

This tutorial is of my own creation and any resemblance to any other tutorial is purely coincidental. This tutorial is for personal use only, using it for monetary gain is against my TOU's.
This tutorial was written in July 18th, 2011.
Supplies you'll need:
Photoshop CS3
Filters:
Greg's Factory Output Vol. II –> Pool Shadow
Xero ---> Porcelain
Tube of your Choice:
I used the artwork of Mark Yanko.
You must have a license to use his work and have purchased this tube
You can do so HERE
Scrap kit of Choice:
I used By the Sea by Kikekakits
Which you can purchase HERE
Masks:
Weescottslass Mask 128 you can get HERE
Mask 1 you can get HERE
***Please remember my tutorials are guidelines!! Add your own twist onto it and I would LOVE to see your results!!***
~Let's Get started~
Open a new canvas 650x650 and flood fill with white
Open frame02. Select all. Copy and Paste into your canvas.
Edit--->Transform Scale 65% (be sure the chain link between them is locked so it keeps the same proportions)
Then rotate it to the left to the degree you're liking.
Add drop shadow.
Next, open paper04, resize to fit canvas and apply Mask1
Then create a new layer and flood fill with color of choice from your tube and apply mask 128
Next open up Paper03 and shrink down and angle to match the frame we started with.
With the frame layer selected, use your magic wand and click inside the squares while holding shift to select both squares. Select –> Modify ---> expand by 3, invert selection.
Click on the Paper03 later and click delete, drag just below the frame layer.
Copy and paste your tub onto your canvas. Flip horizontal and move in between your frame and the paper backing.
Hold down ctrl and click on your paper backing to select it then on your tube layer, invert selection and press delete.
Apply Filter.
Xero – Porcelain.
Default settings except blue channel. Slide all the way to left to 0.
Change the blending more of this tube layer to hard light.
Cope and past your tube again. Resize and move to your liking to the right of the frame.
Apply Xero ---> Porcelain
Add Drop shadow.
Add the elements of your liking to the tag. Resize and drop shadow as you'd like as well.
I used the following:
Sand (below frame)
Sand (below frame)
Bubbles01 (below frame)
Flower03
Flower03
Wave
Bottle
Bottle 2
Shell01
Shell04
Starfish01
Starfish03
Add your name to your tag.
Crop and resize to your liking.
*~*MOST IMPORTANT*~*
Add the copyright info for the tube to your tag.
~~~~Animation~~~~~
Go to the paper backing of your frame and duplicated it 5x.
Hide all but the first layer.
Add Filter:
Greg's Factory Output II: Pool Shadow
Diagonal:48
Center:50
Horizontal:50
Diagonal:50
Horizontal:50
Vertical:50
Intensity:61
Lightness:64
Apply then go to your next duplicated layer and apply the filter again but change the diagonal to 58.
Do that for each following layer add 10 to the Diagonal.
Then go to you Animation Window:
Make sure you have only the first layer of paper highlighted and duplicate the animation frame so you have 5 total.
You want it to repeat forever with delay set at: .15 seconds.
One each frame for animation change it so you can only see one of the 5 paper background layers and once that's done press play and it should run just fun and look like a water reflection effect.
Once you're happy with your tag Save it as a .gif.
YAY!!!
You're done!!
Remember I love to see the results so send them into me!!
Friday, June 3, 2011
Hello Everyone so, this is my first post here as well as my first scrapkit ever. I was just playing and my younger sister said she wanted to see something yellow and dark blue so, I just went with it and played a ton and here is what I came up with :D As I said, I am VERY new at all this so any comments or suggestions you have for me would be awesome and I really hope you can fine something to use this for!!
Thanks so much for reading!!
Hugs,
Ashly
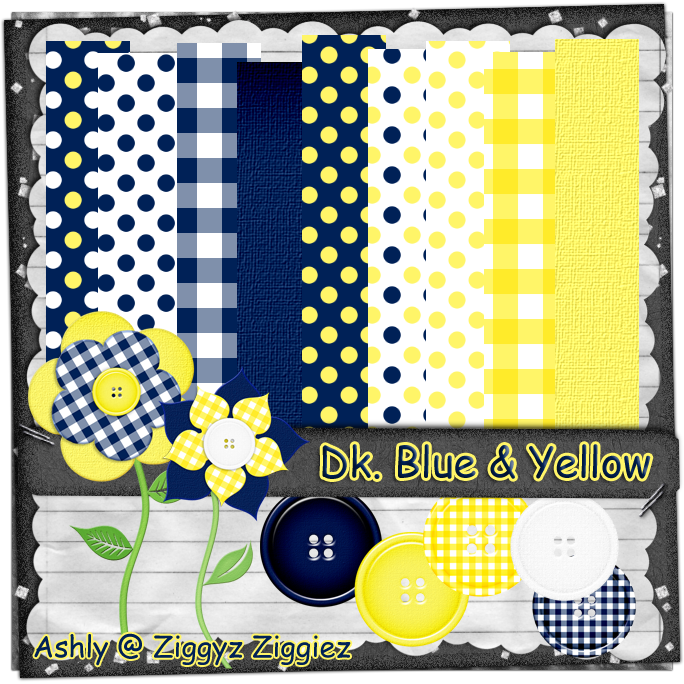
Download HERE
Subscribe to:
Posts
(Atom)
I CT For
